From install to your first configured order
Eight steps, most of them inside Shopify Admin. Plan an afternoon for your first customizer; the slow part is usually exporting the layer images.
-
Step 1: Install Moddify Studio from the Shopify App Store
Open the Moddify Studio listing and click Install. You can start on the free plan and upgrade later, or pick a paid plan with a 14-day free trial.
Screenshot coming soon -
Step 2: Approve the permissions
Shopify lists what the app may access. Products (to link customizers and parts variants), orders (to attach designs, tags and production data to new orders), cart transforms (for checkout pricing) and inventory (to show sold-out parts). After you approve, the app sets up its checkout function for your store automatically.
Screenshot coming soon -
Step 3: Create a customizer and link your product
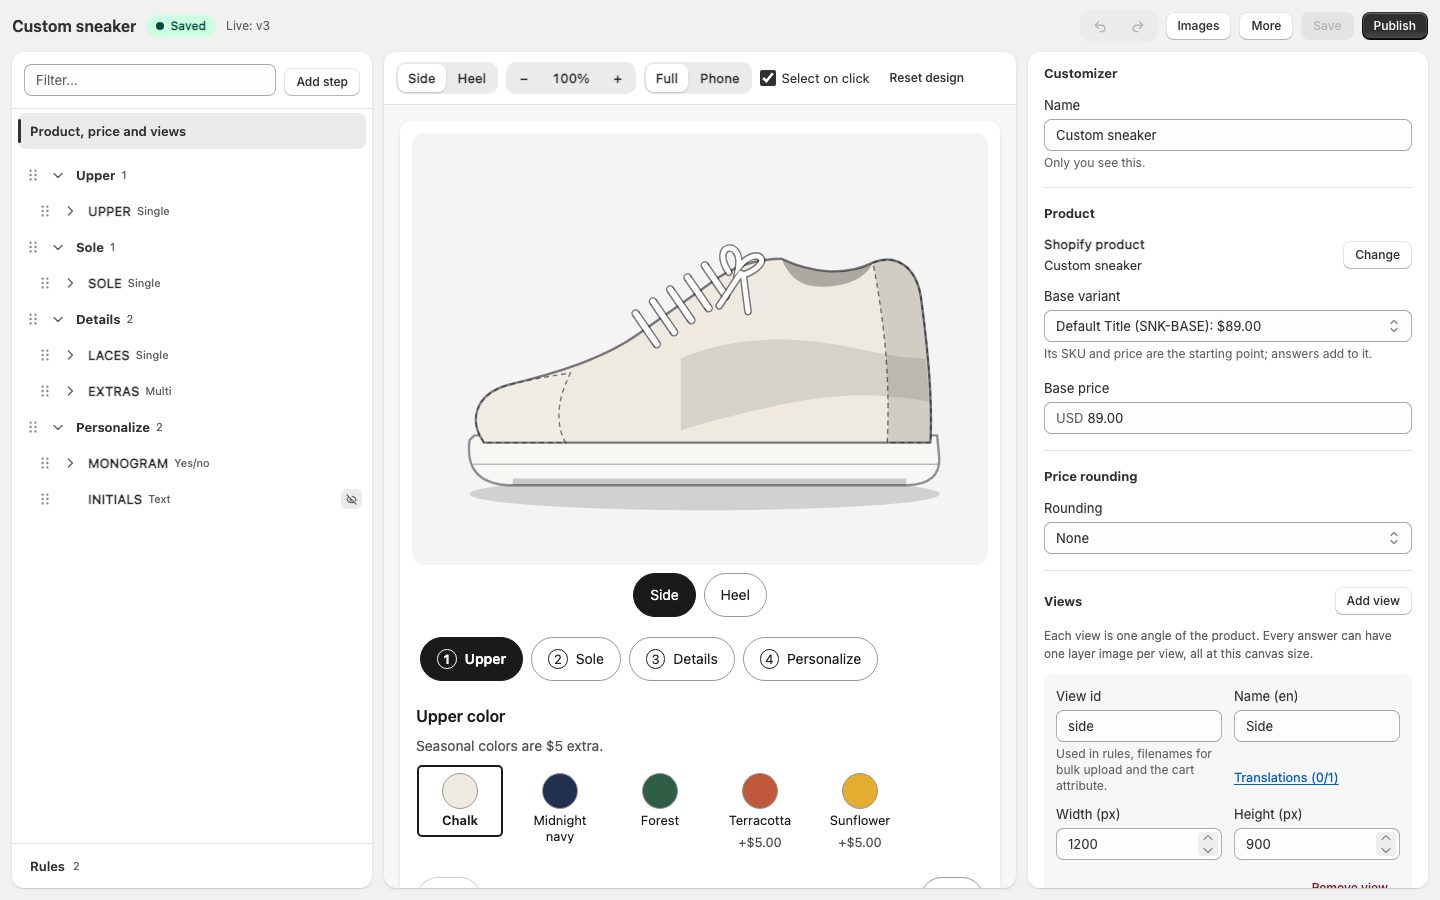
In the app, create a customizer and pick the Shopify product it belongs to. Its variant sets the base price and SKU. Add steps, questions and answers in the tree on the left; the middle pane is the real storefront builder, updated as you type.
-
Step 4: Upload your layer images in one go
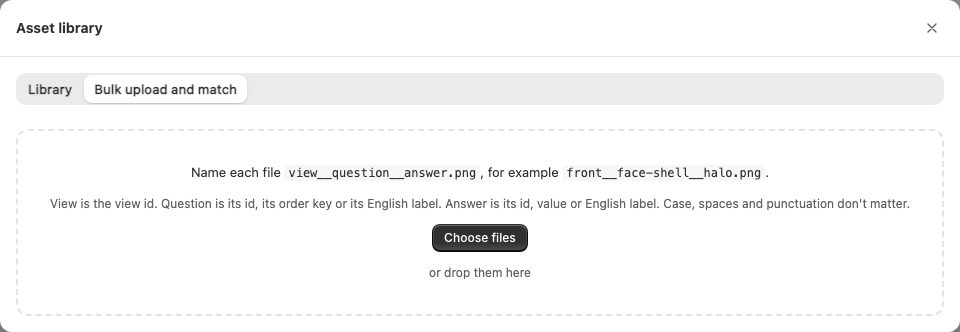
Export one transparent image per answer and view, named like side__upper__forest.png, and drop the whole folder into Bulk upload. The editor matches each file to its answer and shows anything it could not place.
-
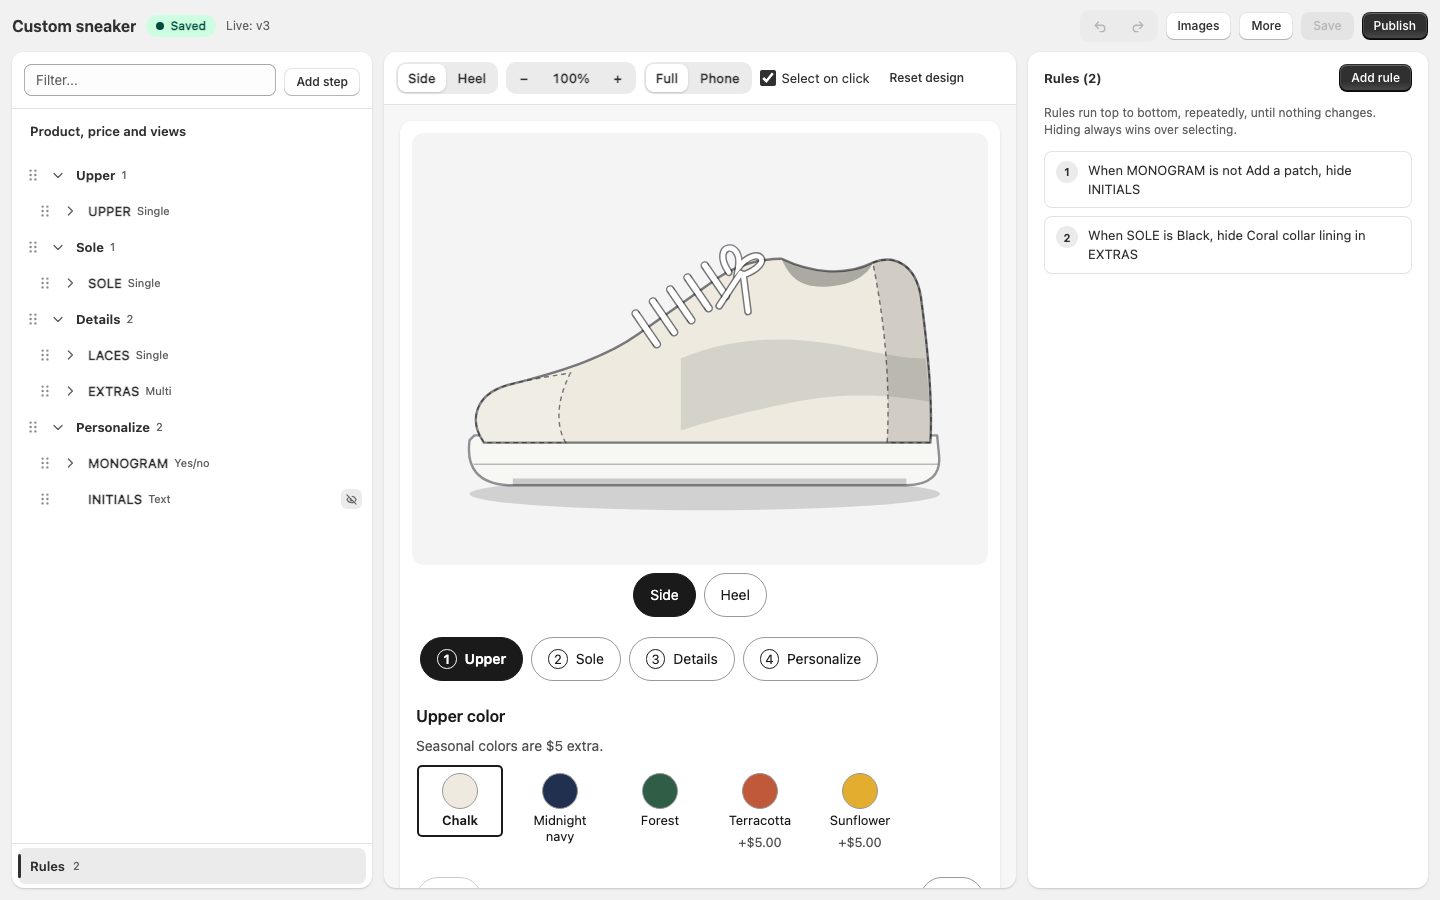
Step 5: Add rules, then publish
Open Rules to hide or force options based on other answers. When the preview looks right, click Publish and add a short note. Publishing freezes a version: later edits never change orders made with it.
-
Step 6: Add the block to your product page
In Online Store, open the theme editor on your product template and add the Moddify Studio app block. It finds the customizer published for that product by itself. Pick the layout, colors and corner radius, and save. Or switch on the app embed to show the builder on every product that has a published customizer.
Screenshot coming soon -
Step 7: Check the builder on your store
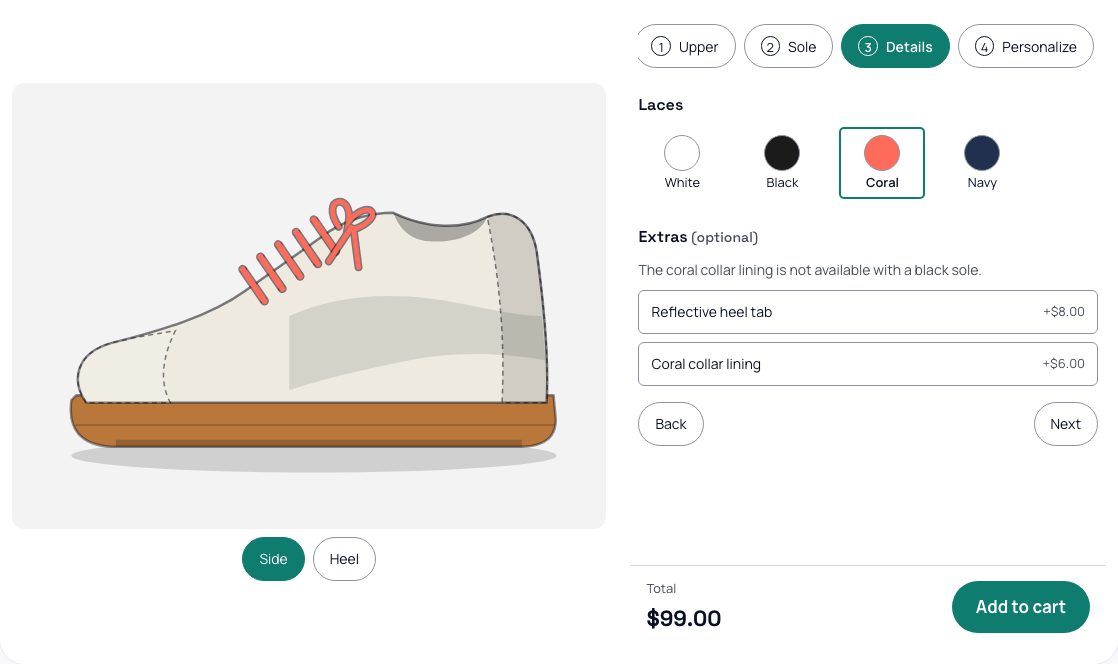
Open the product page on your phone and on a desktop. Walk through every step, try the rules and watch the price. The total on the page is the amount checkout will charge.
-
Step 8: Place a test order
Add a design to the cart and check out with a test payment. The order appears under Orders in the app with its design images and production codes, ready to print as a production sheet. On Shopify's order page you see the design summary and any tags from your order rules.
Screenshot coming soon
Stuck on a step? The getting started guide goes into more detail, or ask us.
Ready to set up your first customizer?
Start on the free plan with one customizer, or try any paid plan free for 14 days. Flat monthly price, no share of your sales.